Arrow releases guide on how to create a window cornice
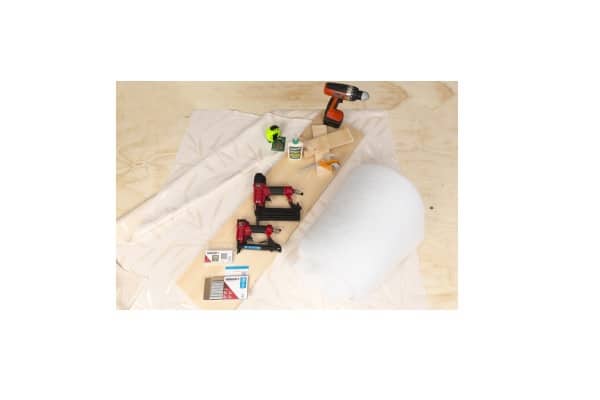
 Arrow has released a guide on how to create a window cornice using its ARPT50 Pneumatic Staple Gun and the ARPT18G Pneumatic Brad Nailer. These tools operate on air compressors up to 120psi, making them a great choice for projects that require a lot of stapling or hand strength.
Arrow recommends using its ARPT50 Pneumatic Staple Gun and the ARPT18G Pneumatic Brad Nailer with 6mm T50 staples and 15mm brad nails. In order to create a window cornice, you will also need a tape measure, glue, nails, scissors, fabric batting, fabric of your choice, L bracket and screws, screwdriver, staple remover and timber board.
Below is Arrow’s step-by-step window cornice guide.
Step 1 – Measure the window

The inside of the cornice frame must be slightly wider than the window frame and the depth of the cornice is determined by the size of the sides. The cornice attaches to the top of the window moulding so it’s a good idea to keep a minimal amount of space between the window frame and the cornice.
Step 2 – Apply wood glue
Once the frame and sides have been cut to the desired sizes, wood glue is applied between the sides and the front of the frame. The ARPT18G Pneumatic Brad Nailer is then used to nail the sides for a tight, secure and lasting bond.
Step 3 – Style it
To achieve a padded look on the cornice, you will need to attach batting. Place the cornice frame on top of the batting, leaving 50mm on all sides of the frame, then cut the batting accordingly and wrap it around the cornice frame. Staple the batting to the back with the ARPT50 Pneumatic Staple Gun. You don’t need to wrap the batting around the sides of the cornice as that part will be up against the wall.
Arrow says adding batting to the sides also makes getting a snug fit for the fabric more difficult and hinders the fit of the window.
Step 4 – Pick the fabric
When picking the fabric consider the colour and style of the room, and ensure its non-stretch.
To get the right amount of fabric, place the fabric face down with the frame on top of it. Leave approximately 30mm of extra fabric on all sides of the cornice and then cut.
Step 5 – Staple again
Double-check that the fabric is aligned at the front of the cornice and carefully staple the fabric to the long sides on the back. Work to keep the fabric tight without overstretching it. Once the back is done, fold the fabric over the sides and staple.
Step 6 – Take on the corners
Take extra time to take on the corners, which can make or break the project. Carefully fold the fabric inward and staple it. Excess fabric can be trimmed to avoid bunchy corners but its best to wait until after the corners have been stapled to do so.
Step 7 – L brackets
Before you add the L brackets, hold the cornice up to the window to ensure you have enough room for the L brackets to extend over the window frame.
Using the screw driver, attach one L bracket to the top of each side of the cornice then make sure the brackets line up with each other so the cornice hangs straight across the window.
Step 8 – Mounting
Mount the cornice to the top of the window frame using the screws that came with the L bracket and a screw-driver.

